Hello, this is George, the owner of Granite Depot. In this article, I’d like to share my personal journey of transitioning from traditional plastic templates to using laser technology and a plotter printer for our templating process. I’ll walk you through the equipment we chose, the pros and cons of the new system, and how it’s impacted our productivity, accuracy, and overall customer satisfaction. If you’re considering making the switch to laser technology, I hope my experience will give you valuable insights to help with your decision.
About half a year ago, I posted in a Facebook group that I wanted to buy a laser for making templates and use a plotter printer for printing. At that time, I couldn’t afford a good CNC saw machine right away, and I also wanted to learn how to work with a laser before getting the CNC, so that mistakes from using new equipment wouldn’t pile up. Now I’d like to share my experience using a laser and printer.
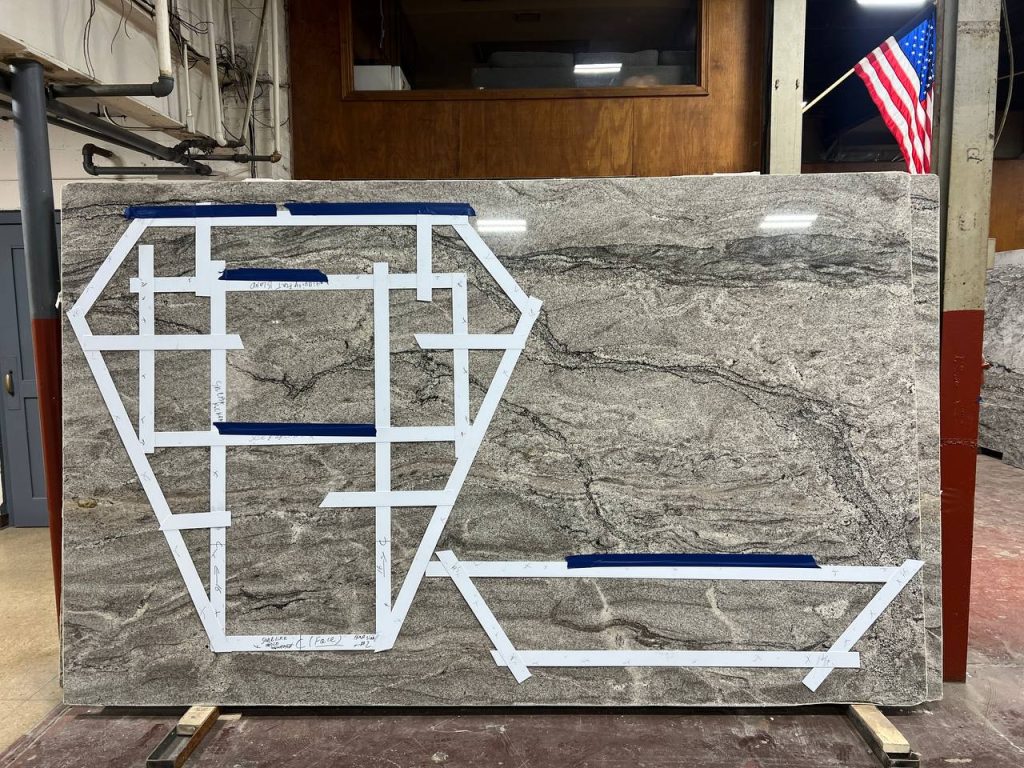
First, I should mention that before using the laser, I used plastic for templates. It was flexible plastic, which could be used with almost any vehicle—I was transporting them in a 1999 Plymouth Voyager.


I think it’s best to start with a review of the equipment I used. I bought an LT-2D3D. This was my first experience using a laser. I spent a long time choosing between Proliner, Flexijet, and LT-2D3D, and I think I read every post in the group on this topic. I didn’t seriously consider Speed Template, though I find it hard to explain why. I didn’t choose Proliner because, in my opinion, it’s outdated technology from the client’s perspective, and it would have been harder for me to sell my product with it. Flexijet was appealing because of its leveling feature, which seemed great after years of manually measuring kitchens. It felt like a solid advantage over competitors, but in the end, I chose the LT-2D3D for several reasons:
- They have a training facility in Chicago, and since I live in Indianapolis, it’s only a 3-hour drive. This comes in handy when training new employees, speeding up the onboarding process. In fact, this happened, and I fully appreciated this advantage.
- The company representative, JT (@james.hoffmann.58), promised to help me figure out the Allen printer and its software (I asked Flexijet representatives about that, but they told me I would need to figure it out on my own).
- Positive interaction with the LT-2D3D representative (this is a subjective point).
- The price—while it wasn’t the deciding factor, I liked that I could make the purchase using a credit card and pay it off interest-free over a year.
As for the printer, I bought a used Allen for only $1,000. Big thanks to @gjgerard for that and the helpful printer modifications that helped hold the vinyl. I also had to buy software for this printer, which cost $1,200 for the license. The license is purchased for the company, so if you buy a used printer, make sure to factor this into your expenses.


Let’s discuss the pros and cons of using the laser
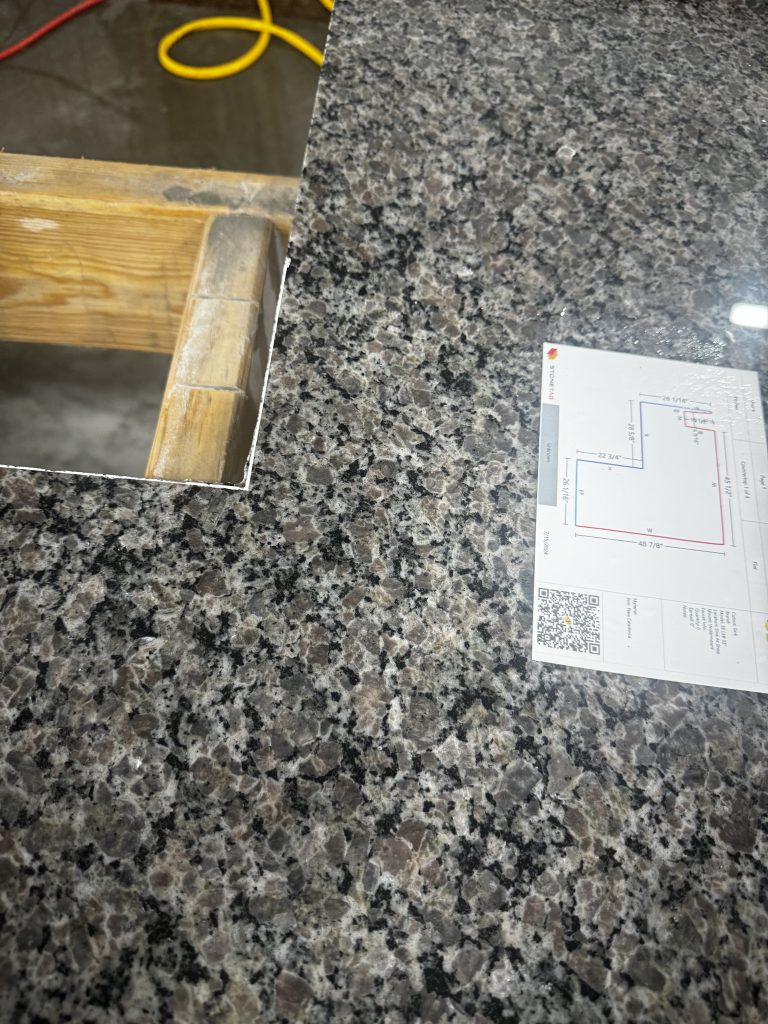
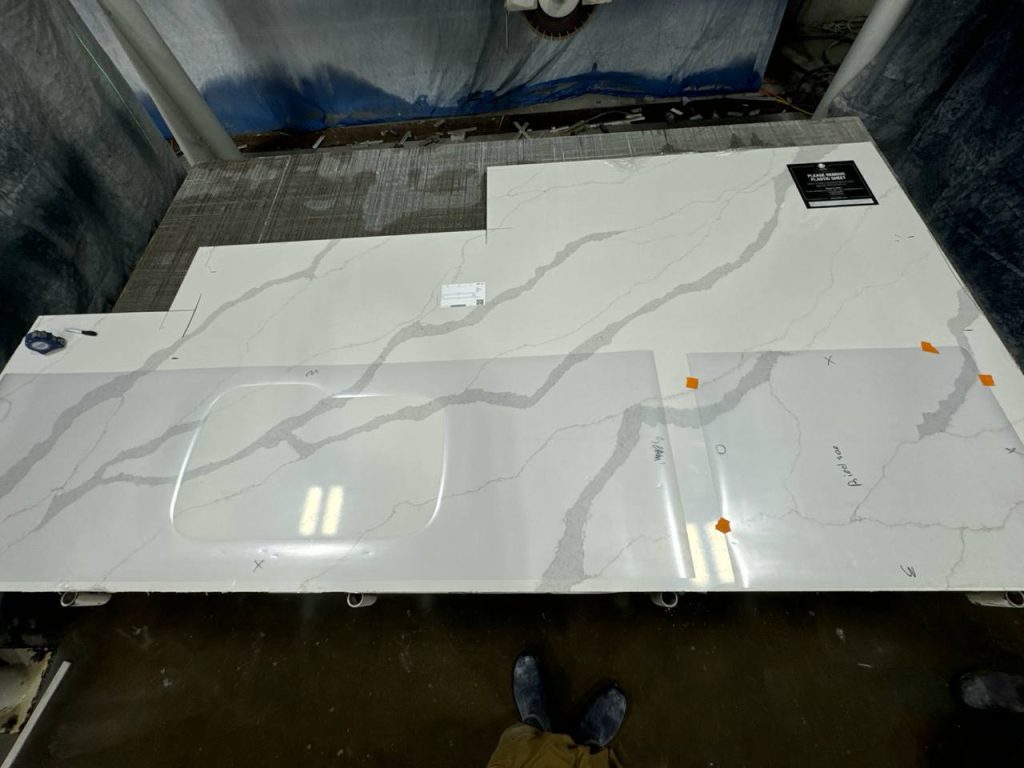
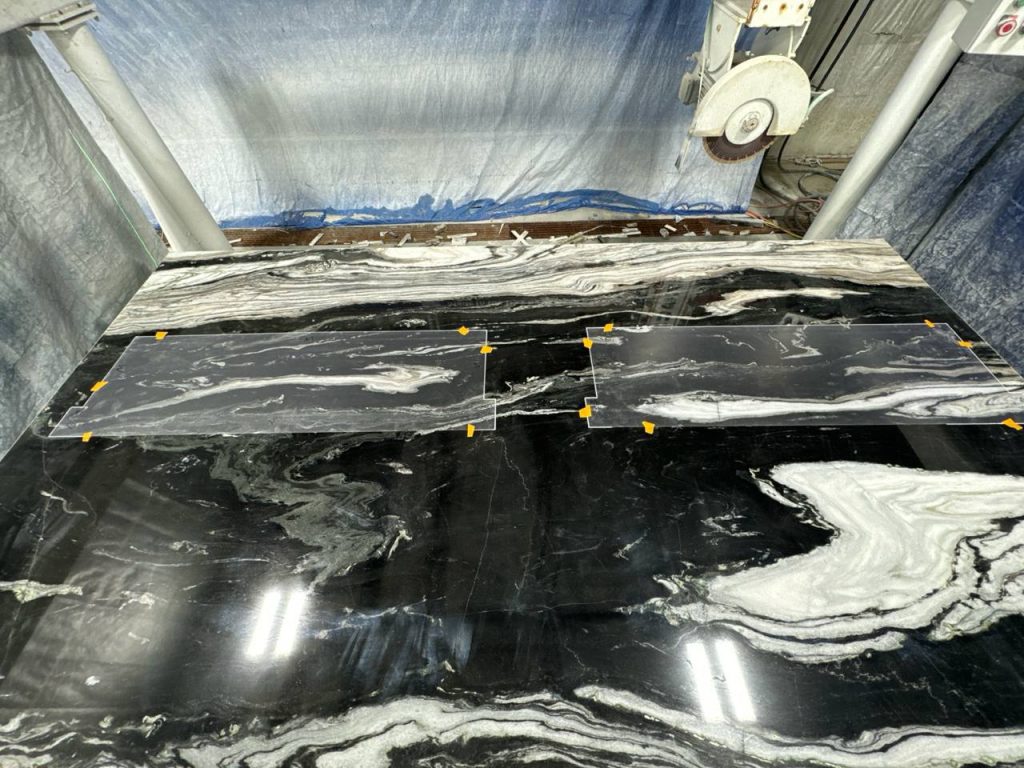
The first and most important advantage is that we now look more professional in the eyes of the customer. Secondly, let’s talk about layouts. This could have been done without the laser, but buying the laser will likely push you in that direction. Notice how the layout looked before going digital and how it looks now. Much better, right? However, this is more due to the software. We used Easy StoneShop at first, and now we’re using Moraware. This small investment saved us tons of time, making layouts clearer and easier for the customer to understand compared to the old method.


Thirdly, we no longer have to remove the old countertop to take measurements. Before, we had to remove it to place the plastic on the cabinets. This made our customers happier, and we no longer had jobs canceled due to the need to remove the countertop before measuring. On the downside, we’ve had more issues with very unlevel cabinets, but that’s a small price to pay for convenience.


Next, we’ve had significantly fewer problems with measurements and production. With plastic, we sometimes had issues on large jobs with multiple seams—they didn’t line up. We occasionally had problems with unevenness when cabinets were installed crookedly, and we had to find some kind of compromise. Complex shapes were also problematic. Plus, there were issues with customer-provided sinks, where we had to make templates manually, wasting time. Now we no longer need to transport all the sinks to the shop for precise measurements.
Another benefit is that we no longer have to store plastic templates. Fifteen kitchens’ worth of plastic templates take up an insane amount of space. Plus, they take up a lot of room in the dumpster afterward, and we have to pay for disposal. It’s also convenient that everything is stored electronically and can be adjusted at any stage of production. One more positive I’d like to note is the ability to print stickers. This greatly simplifies production and looks more professional.

As for productivity: When I was younger, I averaged 6-7 measurements with plastic per day, ha-ha. But realistically, it was about 5 measurements a day. With the laser, we can do about 8 with the same logistics. It’s also become much easier to handle complex artistic shapes. To top it off, they offer a comprehensive video lesson database, so if you ever need guidance on measuring or working with Raptor, you can access the tutorials anytime at your convenience.
Material and Labor Costs: In my opinion, it’s much easier to train someone to work with the laser than with plastic, but everyone can decide for themselves what’s a fair pay for that work.
Printing costs vs. plastic costs: Plastic used to cost me around $105 a week. Of course, I didn’t use it for rectangular pieces with backsplashes, bathrooms, or islands. But with printing, you can apply the same logic, though there’s always the temptation to print everything. At a volume of about 600 square feet per week, I consistently used more than one roll (1.2). At the time of writing, I estimate this to be about $180 per week. By the way, there’s no point in buying expensive rolls of a different color since you’ll still have to outline everything. The printer requires some other consumables, but those cost mere cents. Another big plus is that you can reuse the template if necessary.

Now, let’s talk about the downsides—and yes, there are some
Despite the time savings on measurements, the process of editing, printing, and transferring the values onto the stone takes a lot of time. If we talk numbers, the cost of producing the square footage increased by $1.75, not counting material costs. By the way, here’s what the printing process looks like—it takes about 15 minutes per kitchen, plus about 7 minutes of work in the software.
The Allen software is also very user-unfriendly, and it took us a while to figure it out. An unexpected advantage of the printer is that you can print DXF files of sinks. It’s very convenient and often useful.
Software: The much-praised Raptor software is good, but it’s still rough. A year and a half after its introduction, it still has some unresolved issues.
I would have written this in a separate post, but briefly:
- The laser can’t calculate the area of cutouts for the stove, window, or farm sink. We have to add this manually, and since the square footage is visible to the customer, this sometimes causes problems.
- Another issue is the lack of ability to edit the file itself. We still have to use paper for that.
By the way, take a look at how the work has improved (several photos).


Photos directly on the stone.

Photo of the roll: Each roll holds 150 feet, but in reality, you won’t use about 3-5% of the total footage.
Conclusion
Considering the credit payment ($1,200), cloud and software fees ($120), vinyl costs (an additional $300, difference per month), and $2,400 (additional shop maintenance costs with the laser) = the additional costs amount to about $4,020 for maintaining the new measurement system. You might ask me if it was worth it? My answer is—yes, it was definitely worth it. We gained much more than we lost. The number of mistakes that occurred due to fabrication has been significantly reduced. I estimate that we saved around $3,500 on mistakes (which were recorded and can be valued monetarily). We’ve had significantly fewer problems with the factory and installation, and we’ve been closing more deals. If you, like me, have a manual shop and are considering switching to a laser, I believe it’s the right decision. The pros outweigh the cons, but ultimately, it’s up to you to decide.